 zappi
zappi eddi
eddi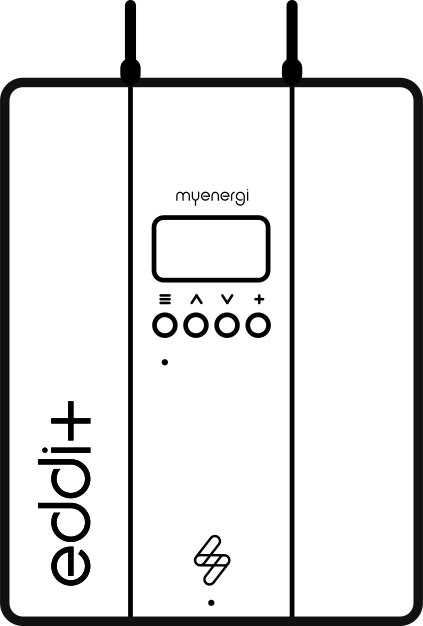 eddi+
eddi+ libbi
libbi harvi
harvi Extras
 EV Charging
 Manage Your Energy
 Maximize Your Energy
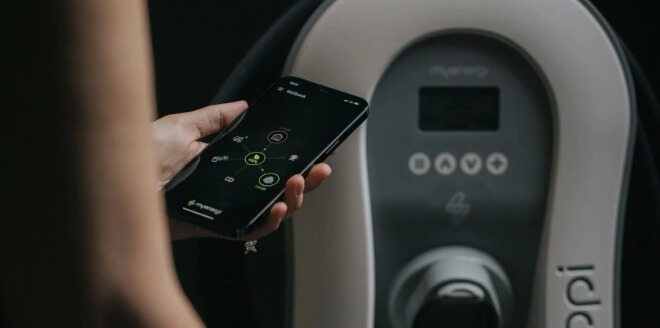 Track Your Energy Usage
 Find an installer
 Commercial Charging Station
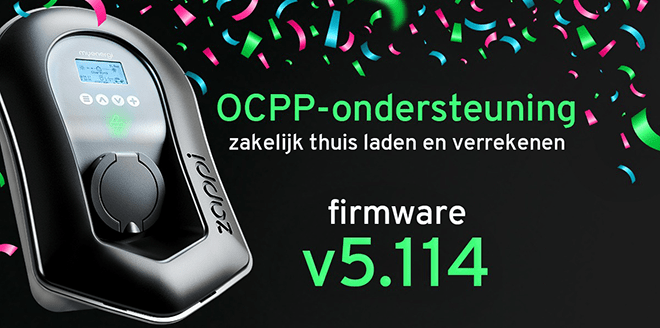 Connect Zappi to a management platform
Read more
Connecting the HomeWizard P1 Meter to the eddi: Step by Step
In our previous blog post, we showed that eddi 2.1 with firmware v5.757 supports the HomeWizard P1 meter. In this follow-up, we’ll explain step by step how to activate that connection yourself using your eddi’s display.
First, you'll read about why the connection is useful and what requirements your system must meet. Then, you'll go through all thirteen steps on the screen, finish by checking the setup in the myenergi app, and learn which common mistakes you should avoid.
Why You Should Connect Your Eddi to the HomeWizard P1 Meter
The eddi is an energy redirector that sends available surplus energy to a suitable resistive heating load, such as an electric heating element in a water heater tank. To do this effectively, eddi needs to know what’s happening in your home at any given moment: how much energy you’re generating, how much you’re consuming, and whether there’s energy being imported or exported.
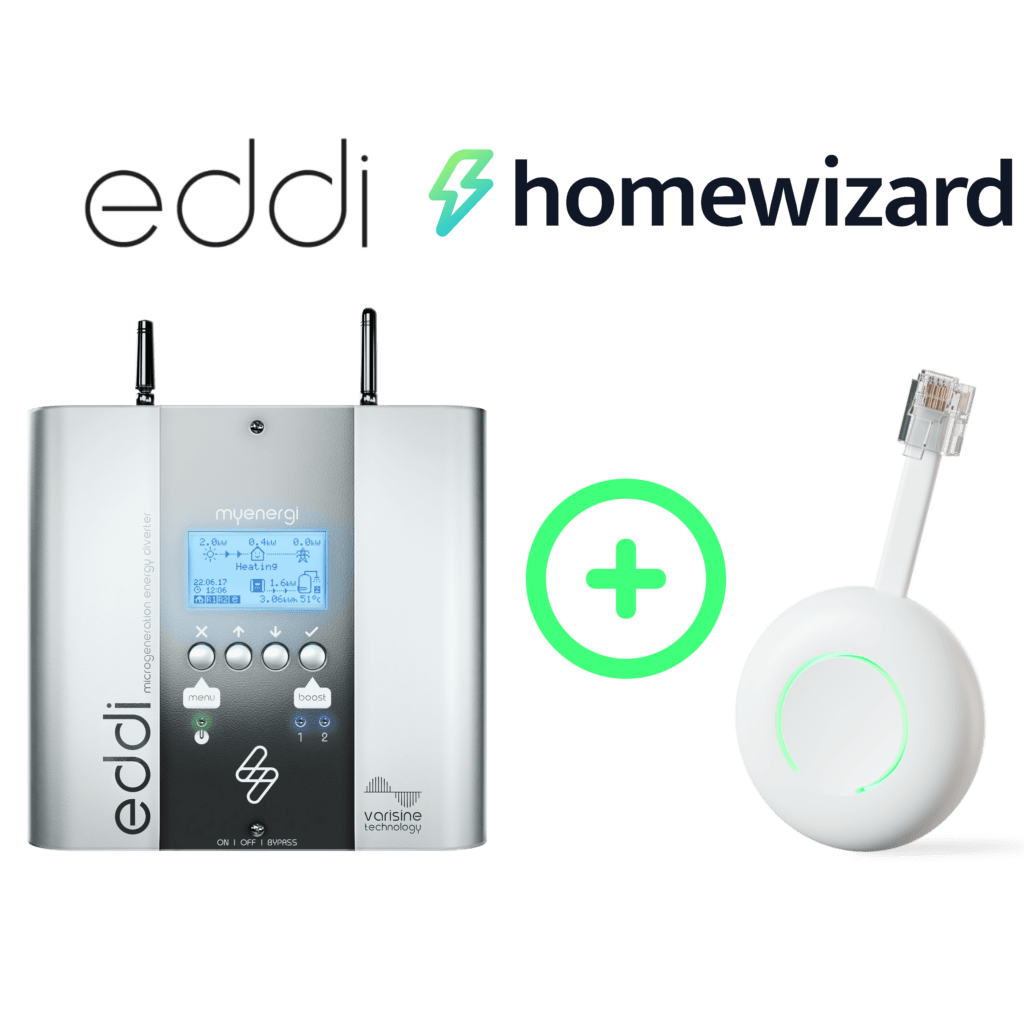
That’s exactly where the connection to the HomeWizard P1 meter comes in. This meter connects to the P1 port on your smart meter and transmits real-time measurement data. By connecting eddi to it, eddi uses that data to intelligently utilize excess self-generated energy instead of feeding it back into the grid.
Effective energy management starts with reliable data. The better your system understands what’s happening in your home, the more control you have over generation, consumption, and net metering, and the more of your own energy you can use. With the end of the net metering program on the horizon, self-consumption is becoming increasingly important.
Terms and Conditions for the HomeWizard P1 Integration
The HomeWizard P1 integration does not work automatically in every situation. Therefore, please check these requirements first. If your setup does not meet any of these requirements, the connection will fail or the measurement will not work as intended.
- Your Eddi is an Eddi 2.1 with firmware v5.757 or higher;
- Your smart meter supports SMR 5.0 or higher;
- The HomeWizard P1 meter is installed on the P1 port of the smart meter;
- eddi is connected via Wi-Fi and not via Ethernet, because this feature works over Wi-Fi;
- The HomeWizard P1 meter and eddi are on the same Wi-Fi network;
- eddi is set up as the master device in the myenergi ecosystem;
- You know Eddi's installer PIN, because you'll need it in step 3;
- eddi's Wi-Fi firmware meets the minimum version requirements;
- eddi is running and displays the main menu.
Are you currently using eddi via a wired Ethernet connection? If so, it’s important to know that the HomeWizard P1 integration works over Wi-Fi. For this feature to work, eddi and the HomeWizard P1 meter must therefore be connected to the same Wi-Fi network. If you’re unsure whether your setup is compatible, or if you don’t know the installer PIN, please contact your installer or myenergi support before activating the connection.
Please note: Directly connected CT clamps are deactivated
This is the most important point to keep in mind throughout the entire process. Please read it carefully before you begin.
Once eddi is paired with the HomeWizard P1 meter, measurements are taken via that P1 meter. CT clamps connected directly to eddi are then taken out of service for as long as the pairing is active. The CT configuration is automatically set to HomeWizard and cannot be manually adjusted while the pairing is active.
For many households, this is fine, because the P1 meter takes over the metering function. However, if you have an existing installation with CT clamps connected directly to eddi, check the configuration of your eddi beforehand. Not sure about the configuration? Have your installer take a look before you enable the HomeWizard P1 integration.
The four buttons on the display
The entire pairing process is done through the eddi display. Below the screen are four buttons that you'll use throughout the procedure:
- ✕ – cancel or go back a step;
- ↑ – scroll up in the menu;
- ↓ – scroll down in the menu;
- ✓ – Confirm or open a menu.
Keep these four buttons in mind. We'll be referring to them throughout the step-by-step guide below.
Connecting the HomeWizard P1 Meter to eddi in 13 Steps
Take your time and follow the steps in order. Each step indicates which screen you'll see at that point.
Step 1 – Open Device Settings
Screen: MAIN MENU. Use the ↓ arrow to scroll down until “Device Settings…” is highlighted on the bottom line. Press ✓ to open this menu.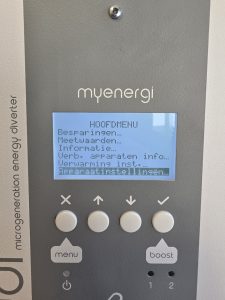
Step 2 – Open Installer Settings
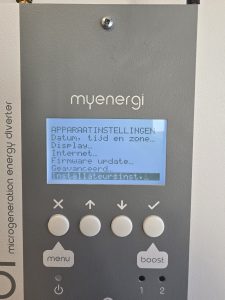
Screen: DEVICE SETTINGS. Use the ↓ arrow to scroll down until “Installer Settings…” is highlighted. Press ✓ to continue.
Step 3 – Enter the PIN
Screen: ENTER PIN CODE. Set each digit using ↑ and ↓, and press ✓ to move to the next digit. Enter your installer PIN code and confirm by pressing ✓.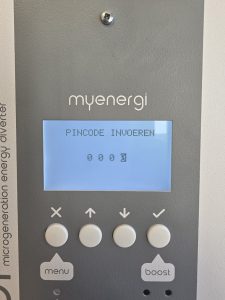
Step 4 – Select "Connected Devices"
Screen: INSTALLER SETTINGS. Use ↑ or ↓ to scroll until “Paired Devices…” is highlighted. Press ✓ to open.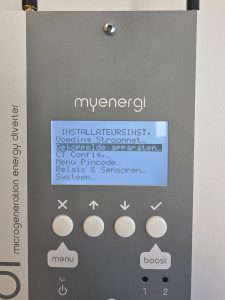
Step 5 – Set Up Open Comm.
Screen: PAIRED DEVICES. Use the ↓ arrow to scroll until “Set up communication…” is highlighted. Press ✓ to continue.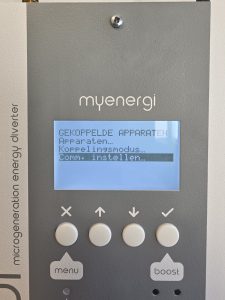
Step 6 – Select HomeWizard
Screen: COMMS SETTINGS. Use the ↓ arrow to scroll until “HomeWizard…” is highlighted. Press ✓ to open the HomeWizard menu.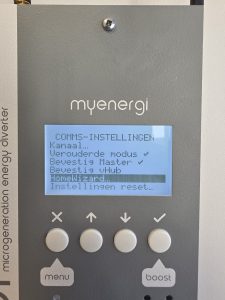
Step 7 – Activate the HomeWizard connection
Screen: HOMEWIZARD. The "HomeWizard" setting is set to "Off." Tap ✓ to start the pairing process.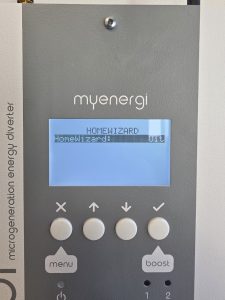
Step 8 – Read the warning and start the search
Screen: HOMEWIZARD. The message indicates that the CT clamps on this device will be disabled as long as eddi is paired with P1. Tap ✓ to search, or ✕ to cancel.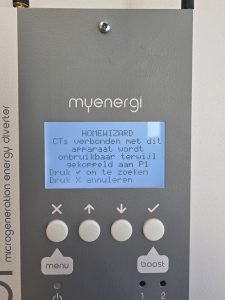
Step 9 – Wait while the search is in progress
Screen: HOMEWIZARD. The display shows “Please wait – Searching for devices.” Wait until the P1 meter appears in the list.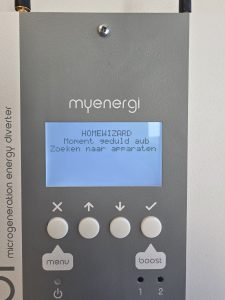
Step 10 – Select the P1 meter you found
Screen: HOMEWIZARD. The meter found will appear, for example, “p1meter-10A290.” Make sure it is selected and press ✓.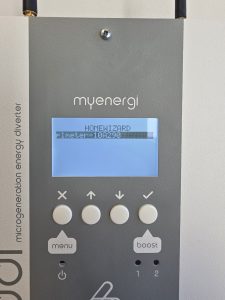
Step 11 – Confirm the selection
Screen: HOMEWIZARD. Check the meter name, for example, “p1meter-10A290.” Tap ✓ to confirm or ✕ to cancel.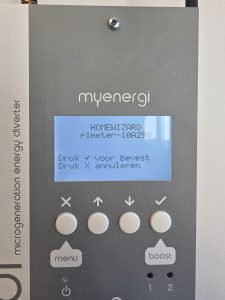
Step 12 – Pairing in progress
Screen: HOMEWIZARD. The display shows “Pairing with p1meter-10A290.” Wait until the pairing is complete.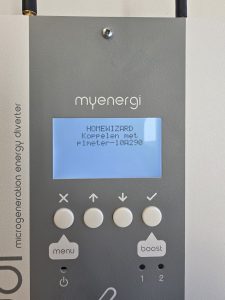
Step 13 – Connection Successful
Screen: HOMEWIZARD. The display confirms: “Pairing with p1meter-10A290 successful!” Tap ✓ to continue. Your eddi is now measuring via the P1 meter.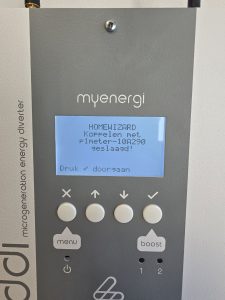
Review in the myenergi app
After completing the setup, check in the myenergi app to see if the meter readings are coming in correctly from the P1 meter. Verify that the import, export, and consumption figures make sense based on what’s happening in your home at that moment.
If you’re generating more power than you’re consuming at that moment, eddi should detect that surplus and, if there’s enough of it, redirect it to the connected resistive heating load. Do you see any unusual or missing values? If so, double-check the settings, especially the Wi-Fi connection and the master device configuration.
Common Mistakes and How to Avoid Them
- Eddi is connected via Ethernet instead of Wi-Fi, which is why the P1 meter cannot be found; connect Eddi to the same Wi-Fi network as the P1 meter;
- The P1 meter and eddi are on different networks—for example, a separate guest network; make sure both are on the same network;
- eddi is not set as the master device, even though only the master device can establish the connection;
- The installer PIN is unknown, which prevents you from proceeding past step 3;
- The firmware is too old, so the HomeWizard option does not appear in the menu; perform the firmware update first;
- An existing CT configuration is overlooked, while directly connected CT terminals are taken out of service during the connection process.
Why myenergi has chosen this approach
The integration with the HomeWizard P1 meter aligns with myenergi’s approach to energy management: giving people insight into and control over their own energy, with devices that work together within a single ecosystem.
eddi isn’t a water heater, but an energy redirector that precisely routes available surplus energy to a suitable resistive heating load. The better eddi understands what’s happening in your home, the more precisely that redirection works. The P1 meter provides that data directly from your smart meter. Together with zappi and libbi, eddi forms a system that gradually increases your self-consumption.
This means that this connection isn't just about technology, but above all about greater insight, greater ease of use, and greater control over your own energy.
Conclusion
With firmware v5.757, you can easily pair a HomeWizard P1 meter with your eddi via the display. Check the requirements beforehand, and keep in mind that CT clamps connected directly to eddi will no longer be used during the pairing process. Then follow the thirteen steps on the screen and, finally, check the meter readings in the myenergi app.
That's how eddi uses real-time data from your smart meter to help you keep more of your own energy in your home. Your energy stays yours.
Frequently Asked Questions
Which Eddi and firmware do I need for the HomeWizard P1 connector?
An eddi 2.1 with firmware v5.757 or higher. Without this firmware, the HomeWizard option will not appear in the menu.
Does the connection also work via a wired Ethernet connection?
No. The HomeWizard P1 integration works via Wi-Fi. eddi and the P1 meter must be on the same Wi-Fi network.
What happens to my CT clamps that are directly connected to eddi?
They are disabled as long as the P1 connection is active. Metering then takes place via the P1 meter, and the CT configuration is automatically set to HomeWizard; you cannot adjust it manually while the connection is active.
I don't know my installer PIN. What should I do?
In Step 3, you'll need the installer PIN. If you don't have it, contact your installer or myenergi support.
How do I know if the connection was successful?
After step 13, the display will show “Pairing … successful!”. Then check in the myenergi app to make sure the readings are coming in correctly from the P1 meter.
What if the P1 meter isn't found during the search?
Check to make sure the P1 meter is connected to the P1 port on your smart meter, that both devices are on the same Wi-Fi network, and that eddi is set as the master device. If necessary, go through the entire list of requirements again.
Internal links:
- Prequel: https://www.myenergi.com/nl/2026/06/08/eddi-firmware-v5-757-homewizard-p1-integratie-en-extra-taalkeuze/
- End of net metering: https://www.myenergi.com/nl/2026/05/11/einde-saldering-waarom-zonnestroom-bufferen-straks-belangrijker-wordt/
- Energy Redirect vs. Feed-in: https://www.myenergi.com/nl/2026/01/22/energieomleider-vs-terugleveren/
- eddi product page: https://www.myenergi.com/nl/product/eddi/
- eddi support: https://www.myenergi.com/nl/product-support/eddi/
- myenergi app: https://myenergi.com/nl/app/